Creating a Flash/Splash Screen for the Application
If you’ve landed here without the first step, please follow this link here: How to create apps with no coding & Admob integration (step one)
step three continues……
Flash screen shows when an app is launched for the first time on android devices or it may be some kind of process used in showing a screen to users just before the app loads completely

Remeber i asked you to create a flashcreen activity?
just go back to your homepage, at the button of your screen, click on any activity you have, normally ends with .xml, now switch to flashcreen.xml.
At this point i don’t need to stat repeating where things are all over again, if you don’t know where anything is, go back to the previous steps and find where they are, I’ve literally covered them all.
Now go to your home page, drag LinearH to your template phone, then set the match_parent. width and hight to match_parent.
Now click on gravity and select center_horizontal, and center_vertical.
Next thing to do is drag imageview to your template phone, and drag Textview to your template phone as well.

Click on the imageview you dragged in and upload whatever you want as the flashcreen, then click on the textview to edit the Text.

You can aslo change the background color by clicking on the linearH you dragged in and then, at the buttom where most settings are, click background, then chose your color.
Now add onCreate event to the activity. Go to event, click on activity at the top left, then click on onCreate. After clicking on oncreate, now click on Component at the buttom right (second to the last block category), then click on add componet at the left hand side. Then click on the timer,and name it timer, then add.
Now Add the following blocks below

Now go back to your home page ( Where we first started) it should be main.xml, i’ve told you how to switch between activities. Like flashcreen.xml, main.xml, main1.xml, so switch to the main that has all your images for home page.
Now go to event, actvity, then click on oncreate, then add this blocks below. If you don’t see the hidebackbutton, you can create one yourself by cliking the create at the left hand side, then input the blcok name as you see it below, then make sure the block variable is set to string.

Finally, at the top right of the app , youll see three dots, close to the save button. Click on the option ( 3 Dots ), then click on Library, now switch on the AppCompat and Design.And yeah we done with the app, you can save your work and click on run on the home page, then ready to get your app installed.
Easy way to Integrate Admob Ads to the Application on Sketchware
(Banner and Interstitial Ads)
At the top right of the app , you’ll see three dots, close to the save button. Click on the option (3 Dots ), then click on admob, now put your ad unit name, you can
say banner ads, then add your ad unit and save. Now do the same for interstitial ads, then save and follow other procedures like your devices number, etc.

Now go to your main1activity home, not your main.xml. The very one we created and used progressbar and weview on.
At the buttom left of your home page, you’ll see Adview. Hold and drag the adview, Which is banner ads. Drag and drop to your prefered place on the template phone. After placing,set the weight to 1, then save your work.
Now go to event , click on activity, now add new activity with the button at the buttom right.Then you’ll see onPosCreate, select that, then add. After adding, click on the onPostCreate you’ve just created, then add the blocks below.
This is for banner ads

Save your work.
This is for Interstitial ads
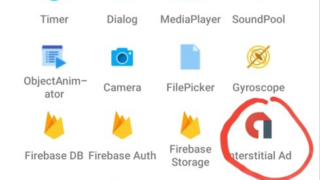
Go to component, then click the add new button at the buttom right. Now click on Interstital ads, just name it interstitial ads, then add.

After adding, click on it, click on onaddloaded, then add this block below.

Finall step, now go back to event, click on onpostcreate, if you could remember, we recently added a block there? Now check this blocks below and update it.

And finally we done here.


